
(Recipe can be found on the Food Network site here.)
Step by Step Instructions:

To make this dish (minus the fish), the following ingredients are needed: About 3 cups of Fresh Basil, Extra-Virgin Olive Oil, Grated Parmesan Cheese, Freshly Ground Pepper, Kosher Salt, 1/2 cup of Pine Nuts, One Lemon, One Orange, One Garlic Clove, and One Box of Whole Grain Spaghetti.
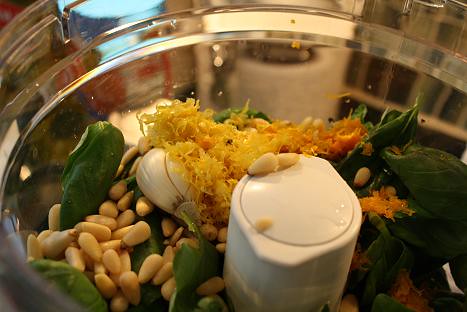
I went ahead and put a pot of water on the stove to boil for the pasta. In the meantime, the pesto can be made first, so I started by putting the basil, pine nuts, garlic clove, and zest of one lemon and one orange in the food processor bowl.
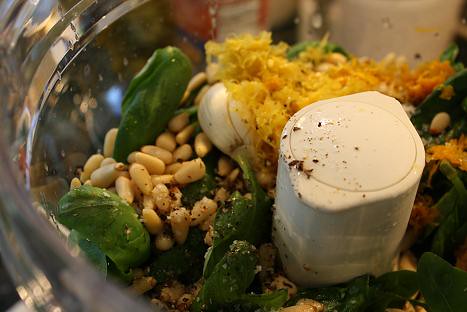
To the food processor, I then added the juice of one orange, the juice of one lemon, and 1/2 teaspoon of both salt and pepper.
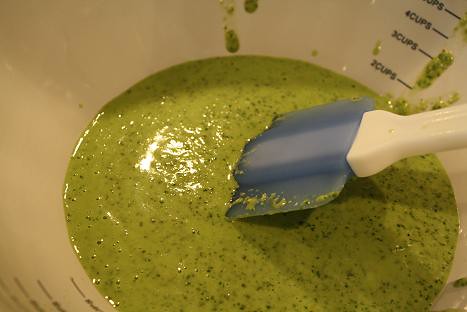
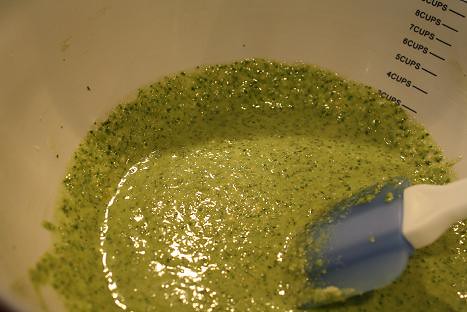
I ran the processor until the ingredients were finely chopped. Then, I kept the food processor running and slowly drizzled in 1/2 cup of olive oil until a smooth pesto (as seen above) was created.
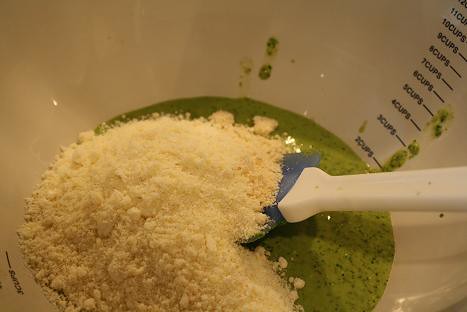
One cup of grated Parmesan cheese gets added to the pesto…
…and once it’s mixed in, the pesto is complete. Set it aside until the pasta gets cooked.
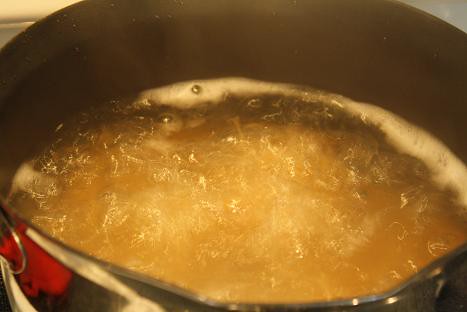
By now my pasta water was boiling, so I started cooking the pasta following the instructions on the packaging.

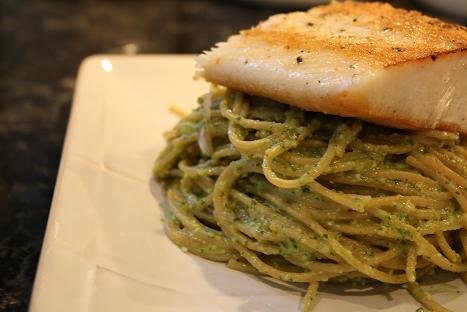
Then I put about 1 Tablespoon of olive oil in a pan over medium heat. While the oil heated, I put oil and a little salt and pepper on one side of the mahi mahi and cooked it for about 10-12 minutes, turning it once. I cut the fish in half and it was enough for two servings.
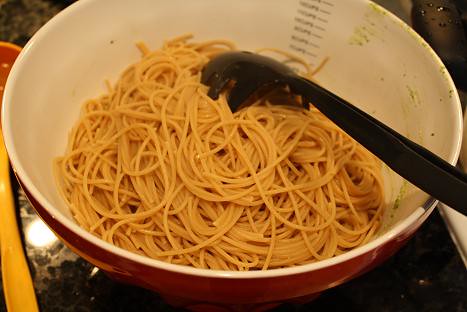
Once the pasta is cooked, I added it to the bowl of pesto along with about 1/2 cup of pasta water.

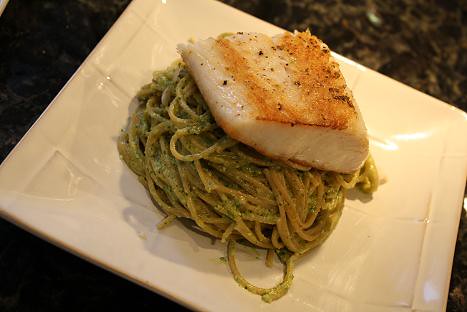
Then it’s time to toss the pasta with the pesto and serve. I plated the pasta and topped it with the fish. I can’t say enough great things about this dish. The fresh ingredients and lightness of the fish make it a perfect dish for the weeknight and the citrus flavors make it a great option for the Summer. Now head to the grocery store and get cookin’!
Ingredients:
For the Citrus pesto:
1 pound spaghetti pasta (recommended: Barilla)
1 bunch fresh basil, about 3 cups leaves
1/2 cup toasted pine nuts
1 clove garlic
1 lemon, zest grated and juiced
1 orange, zest grated and juiced
1/2 teaspoon salt
1/2 teaspoon freshly ground black pepper
1/2 cup extra-virgin olive oil
1 cup grated Parmesan
For the Swordfish:
4 (6-ounce) swordfish steaks
Extra-virgin olive oil
Salt and freshly ground black pepper
Preparation Instructions:
1. Bring a large pot of salted water to a boil over high heat. Add the pasta and cook until tender but still firm to the bite, stirring occasionally, about 8 to 10 minutes. Drain pasta and reserve 1/2 cup of the pasta liquid.
2. Blend the basil, pine nuts, garlic, zests, juices, salt, and pepper in a food processor until the mixture is finely chopped. With the machine running, gradually add the olive oil until the mixture is smooth and creamy. Transfer to a bowl and stir in the Parmesan. Toss with the warm spaghetti and the reserved pasta water.
3. Meanwhile, place a grill pan over medium-high heat or preheat a gas or charcoal grill. Brush both sides of the swordfish fillets with olive oil and season with salt and pepper. Grill the swordfish 3 to 4 minutes a side for a 1-inch thick fillet.
4.Transfer the pasta to a serving platter and top with the grilled swordfish fillets and serve.
0
Leave a Reply