
(Recipe can be found at Ring Finger Tan Line site here.)
Step by Step Instructions:
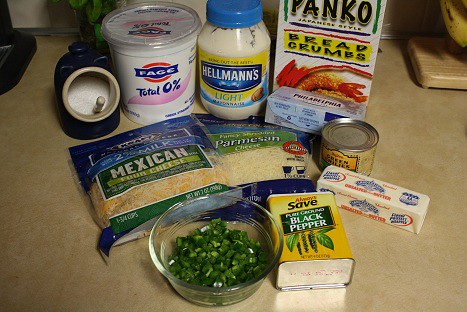
This delightfully delicious dip is lightened up and calls for the following ingredients: Salt, Fat-free Greek Yogurt, Mayo, Panko Bread Crumbs, 8 ounces of Neufchâtel or 1/3 less fat Cream Cheese, 2 ounces of Diced Green Chilies, 1 tablespoon of Butter, Pepper, Shredded Parmesan Cheese, Mexican-blend shredded cheese, and 2 seeded, minced jalapeños.

Before you do anything, preheat the oven to 375 degrees. Then begin the dip by putting the softened neufchâtel or cream cheese, 1/2 cup of Greek yogurt, and 2 tablespoons of Mayo in a mixing bowl. Combine the mixture until it’s well-blended.

Next you’ll add 1/2 cup of Mexican-blend cheese, 1/4 cup of the Parmesan cheese, 2 ounces of diced green chilies, the minced jalapeños, and salt and pepper to taste.
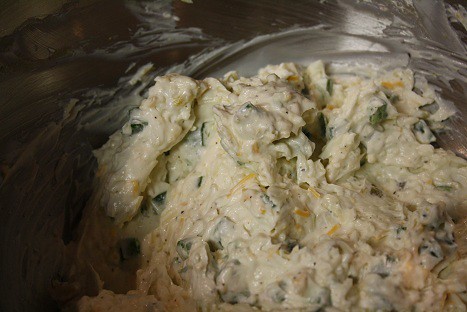
Then stir the mixture until all of the ingredients are well incorporated. Yum!
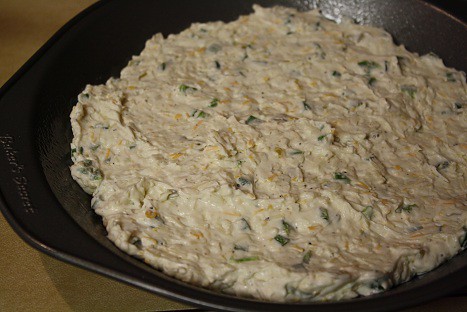
Find yourself an oven-proof pan. I used a pie pan, but you can choose whatever you’d like. Add the dip to the pan. I went ahead and sprayed it with cooking spray first.

Time for the topping…in a bowl add 1/2 cup of Panko bread crumbs, the remaining 1/4 cup of Parmesan cheese, and 1 tablespoon of melted butter.
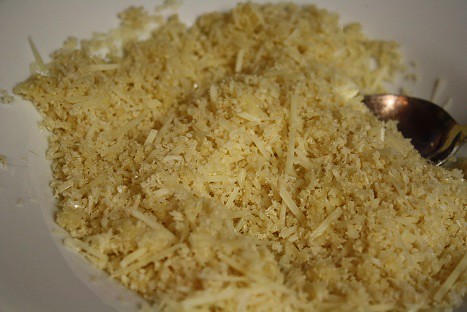
Stir all of the ingredients until everything is evenly mixed.
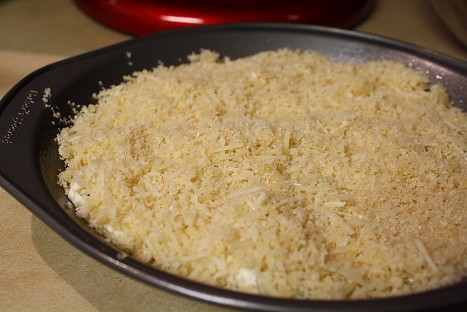
Sprinkle the topping over the dip and transfer it to the oven. You’ll want to bake it about 20 minutes. Then switch the oven to broil and broil it on hi for 2-3 minutes. Definitely keep an eye on the dip. You’re going for a golden, browned crust but you don’t want it to get burned on top.
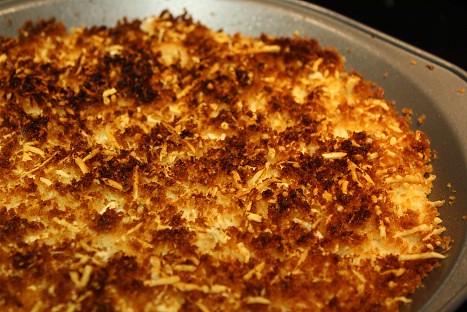
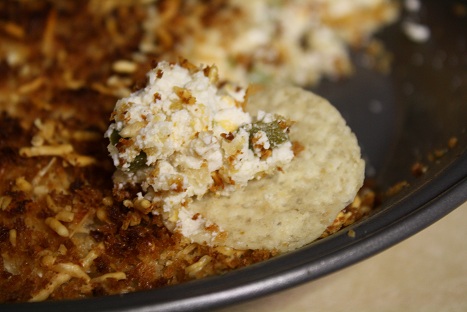
Then remove it and let it cool for a bit. Grab some tortilla chips, your favorite crackers or a sliced baguette…
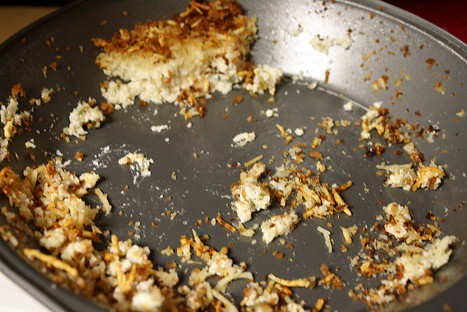
…and enjoy! This was delicious! The consensus was that the dip got even better the longer it sat out, and it was very popular. In fact, as you can see below, the dip was gone in no time. So delightful and your friends and family will love you when you bring this to your next get together! Happy snacking, friends!
Lightened Jalapeño Popper Dip
Ingredients:
1 8-oz. pack neufchâtel cheese (basically the same as low-fat cream cheese)
1/2c fat free greek yogurt
2 Tbsp mayonnaise (the real kind – this will give you the perfect texture to make it feel non-lightened)
1/2 c shredded mexican blend cheese (low fat if you prefer)
1/2 c parmesan
1/2 can diced green chilis (2 oz)
2 fresh jalapeños, seeded and minced
salt & pepper to taste
1/2 c panko bread crumbs
1 Tbsp butter, melted
Preparation Instructions:
1. Preheat oven to 375 F.
2. In a medium bowl, blend together neufchâtel cheese, yogurt, and mayo until smooth. Stir in 1/2 c mexican cheeses, 1/4 c of the parmesan, diced chilis, minced jalapeños, salt, and pepper.
3. Remove dip to an oven-safe container (I just used a pie pan).
4. Mix panko bread crumbs with melted butter and remaining parmesan, sprinkle mixture over top.
5. Bake for 20 min, then switch to the broiler for 3 additional minutes to make the top extra golden brown.
1
Leave a Reply